Google Vault is a powerful tool for exporting, managing, and searching data from Google Workspace. Whether you need to comply with legal requirements, conduct eDiscovery, or simply archive emails, exporting a user’s mailbox using Google Vault is a straightforward process. Here’s a quick step-by-step guide on how to do it.
Step 1: Access Google Vault
1.1 Log in to Google Vault:
- Open your browser and navigate to Google Vault.
- Sign in with your Google Workspace admin credentials.
1.2. Dashboard Overview:
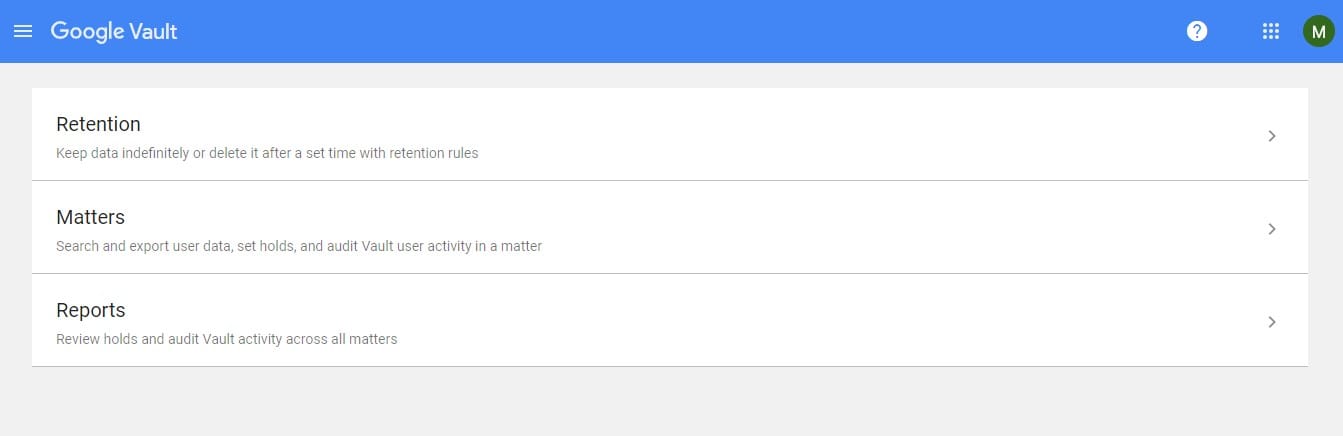
- Once logged in, you’ll see the Vault dashboard where you can manage matters, searches, and exports.
Step 2: Create or Select a Matter
2.1 Create a New Matter:
- Click “Create” to start a new matter.
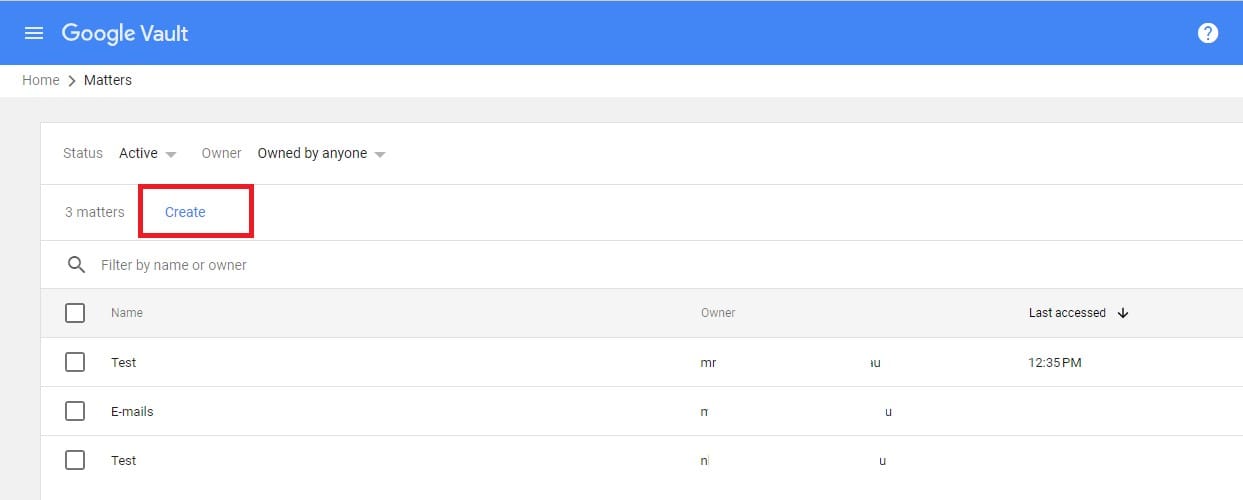
- Enter a descriptive name for the matter, then click “Create”.
2.2 Use an Existing Matter or create a new Matter
- If you have an existing matter where you want to perform the search, simply select it from the list.
Step 3: Set Up a New Search
3.1 Start a New Search:
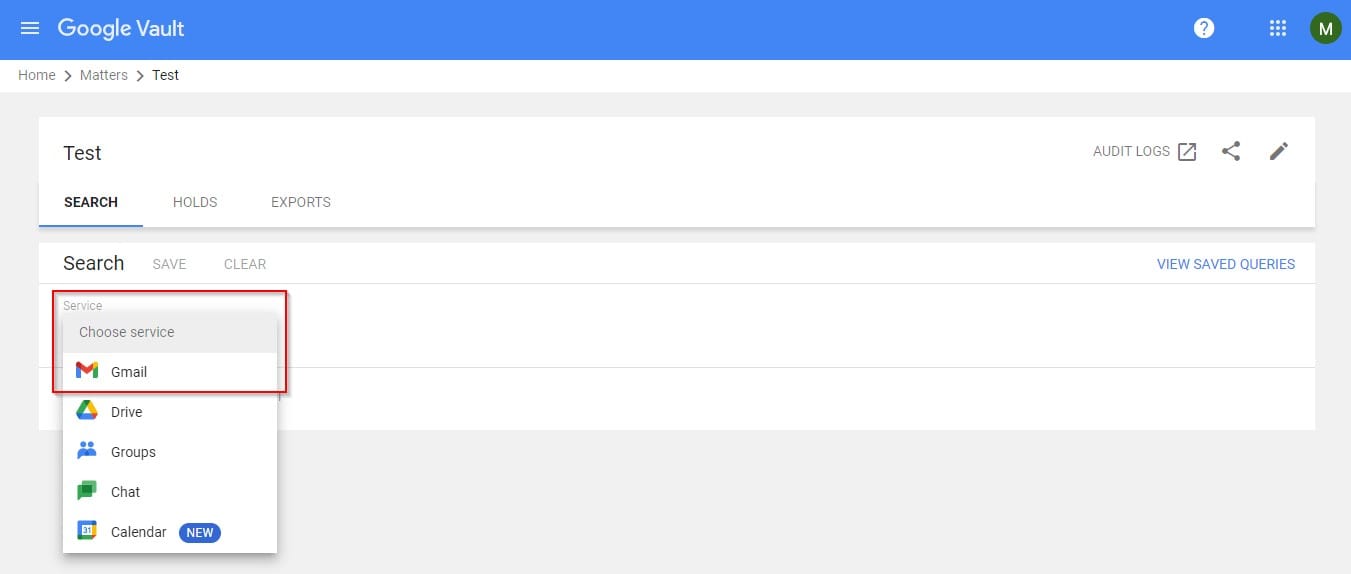
- Inside the matter, click on “Search”.
- Select “Gmail” as the service to search through email messages.
3.2 Configure Search Criteria:
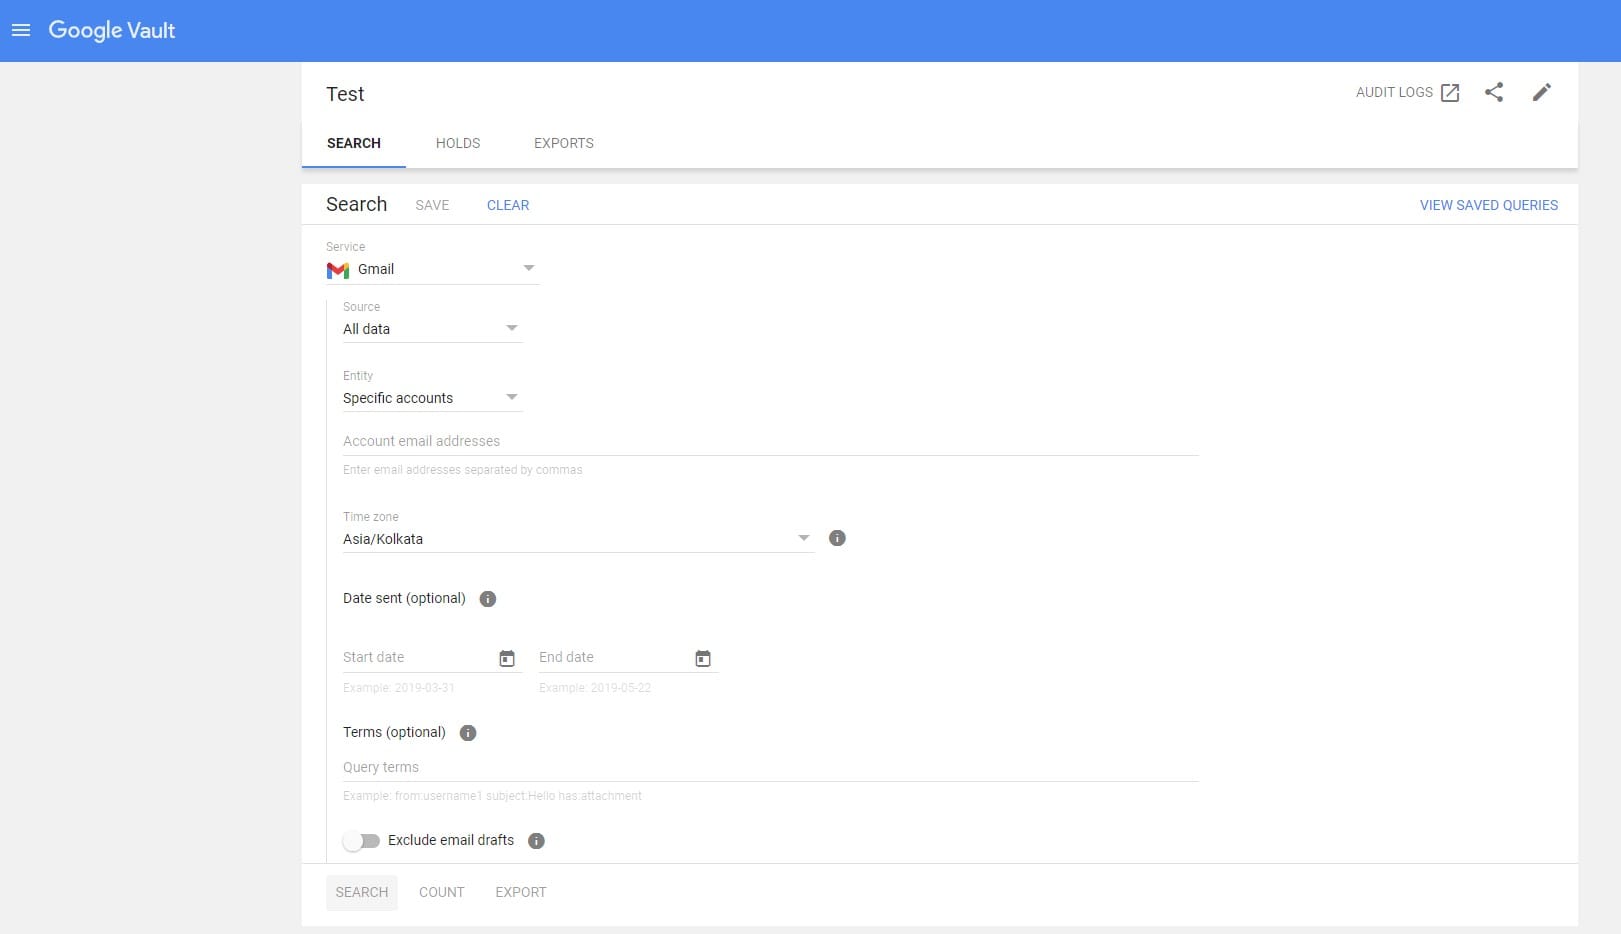
- User Account: Enter the email address of the user whose mailbox you want to export.
- Date Range: Set the date range to cover the period you need, for example, from the user’s account creation date to the present.
- Labels and Folders (Optional): If you want to include or exclude specific labels or folders (like Sent Items), adjust these settings as necessary.
3.3 Run the Search:

- Click “Search” to execute the search based on your configured criteria.
- Wait for Google Vault to process and display the search results.
Step 4: Export the Search Results
4.1 Review Search Results:
After the search is completed, review the results to ensure that they include all the emails you need.
4.2 Initiate Export:,
- Click on “Export” to start the process of exporting.
- Google Vault will prompt you to configure export settings.
4.3 Configure Export Settings:
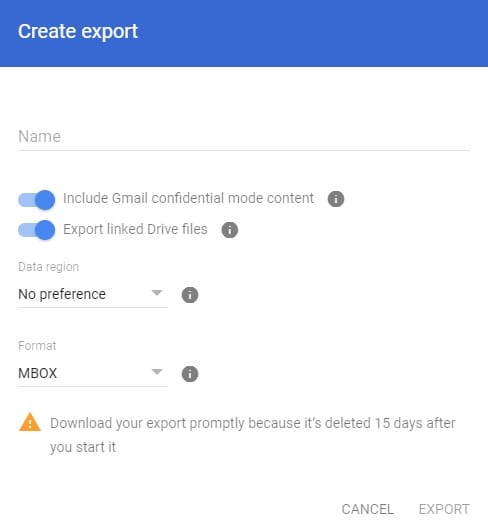
- Export Format: Ensure that the format selected is This is the standard format for email archives and is compatible with many email clients and tools.
- Additional Settings: Configure any additional options if needed, such as whether to include all items or apply specific filters.
4.4 Start Export:
- Click “Export” to initiate the export. Google Vault will prepare the export file, which might take some time depending on the volume of data.
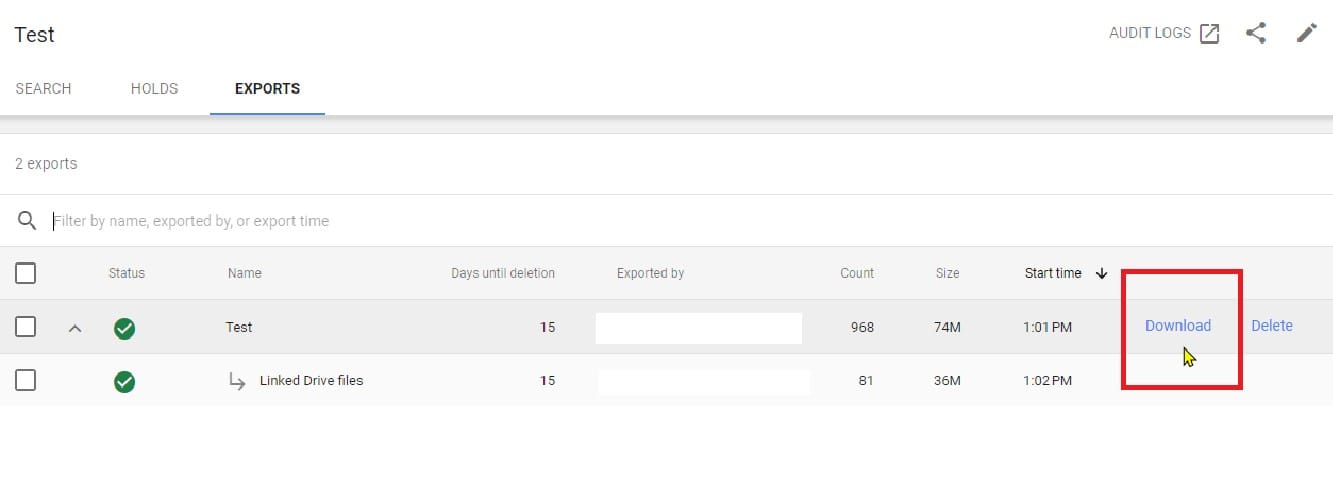
Step 5: Download and Verify Exported Data
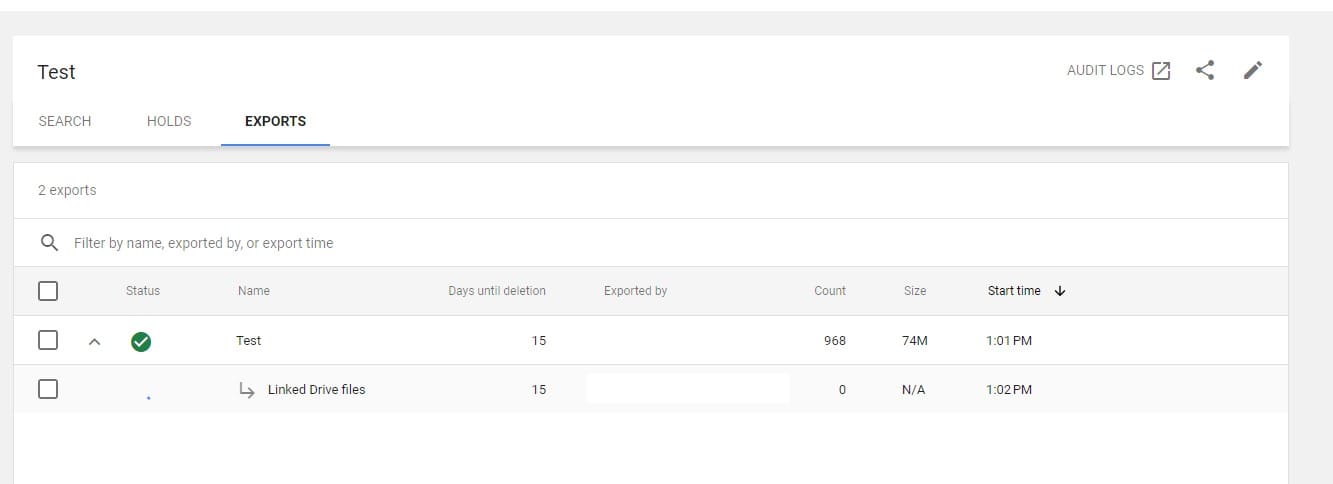
5.1 Download the Exported File:
- Click the link in the email or go to the “Exports” section in Google Vault to download the MBOX file.
5.2 Verify the Exported Data:
- Open the MBOX file using an email client like Mozilla Thunderbird, Apple Mail, or a conversion tool.
- Check the content to ensure it includes all the expected emails and that the export was successful.
Conclusion
Exporting a user’s mailbox using Google Vault is a critical task for compliance, eDiscovery, or archiving purposes. By following the steps outlined in this guide, you can efficiently export the necessary email data.
Always ensure that you review and verify the exported data to confirm its completeness and accuracy. For any specific needs or issues, you can touch base with Google Workspace support and seek further assistance.
Need further help with Google Workspace migrations or data management? Our team of experts is here to support you with tailored managed IT solutions. Request a Managed IT Consultation today.