Migrating emails from one platform to another is a critical step for businesses. But thanks to an IMAP migration endpoint, the process becomes quite manageable.
Think of an IMAP migration endpoint as a bridge that connects your current email system to Exchange online , enabling smooth migration of mailboxes. Setting up an IMAP migration endpoint is the first step for a seamless migration regardless of whether you’re switching from Gmail, Yahoo, or any other IMAP-based email service.
What is an IMAP Migration Endpoint?
Let’s get into the basics first.
An IMAP migration endpoint is a connection point that allows Exchange Online to communicate with an external IMAP server. This endpoint is crucial for migrating mailboxes, as it facilitates the transfer of emails from the source server to Microsoft 365.
When Shall You Use a Migration Endpoint?
A migration endpoint is used when migrating emails from an IMAP-enabled email server to M365.
Basically, when your source email system supports IMAP, M365 uses a migration endpoint to connect and communicate with the source email system.
What Does a Migration Endpoint Do?
A migration endpoint defines the number of mailboxes that need to be migrated and synchronized simultaneously.
How to Create a Migration Endpoint?
In this guide, we will walk you through the simple process of creating an IMAP migration endpoint using the Exchange Admin Center. Even if you’re not a seasoned IT professional, our step-by-step guide will help you get started with ease.
Step 1: Access the Exchange Admin Center
Sign in to Microsoft 365: Use your admin account to log in to the Microsoft 365 portal.
Open Exchange Admin Center: In the left sidebar, find “Exchange” under “Admin Center.”
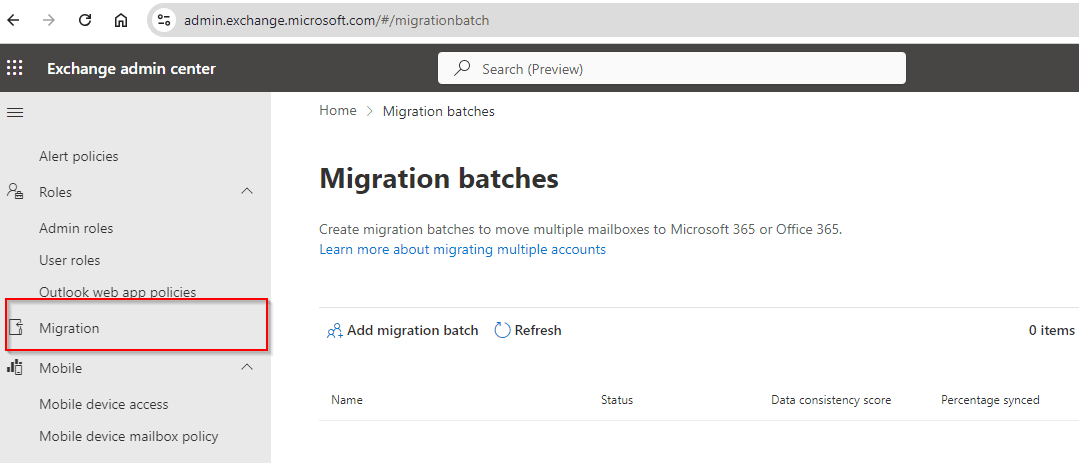
Step 2: Go to the Migration Dashboard
Select Migration: Click on the “Migration” tab to access the migration dashboard.
Step 3: Create a New Migration Endpoint

Access Migration Endpoints and Add New Endpoint: Click on create a new endpoint.

Choose IMAP: When prompted, select “IMAP” as the type of migration endpoint.
Step 4: Enter the IMAP Server Settings

Name Your Endpoint: Provide a descriptive name for the migration endpoint.

Server Information: Enter the fully qualified domain name (FQDN) or IP address of the IMAP server. For example, if migrating from Gmail, you would use “imap.gmail.com.”
Port Configuration: Specify the port for the IMAP server. The standard port is 143, while SSL typically uses port 993.

SSL Connection: Choose whether to use SSL for the connection. Most servers require SSL for secure communication.
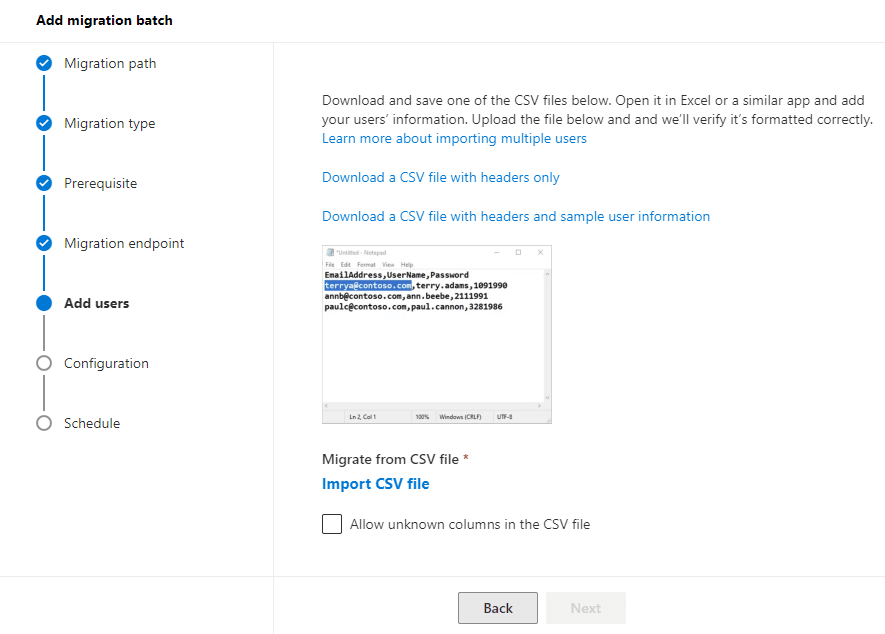
Proceed to Next Step: Download and Import CSV File & Click “Next” after filling in all the necessary information.
Step 5: Confirm the Endpoint Settings
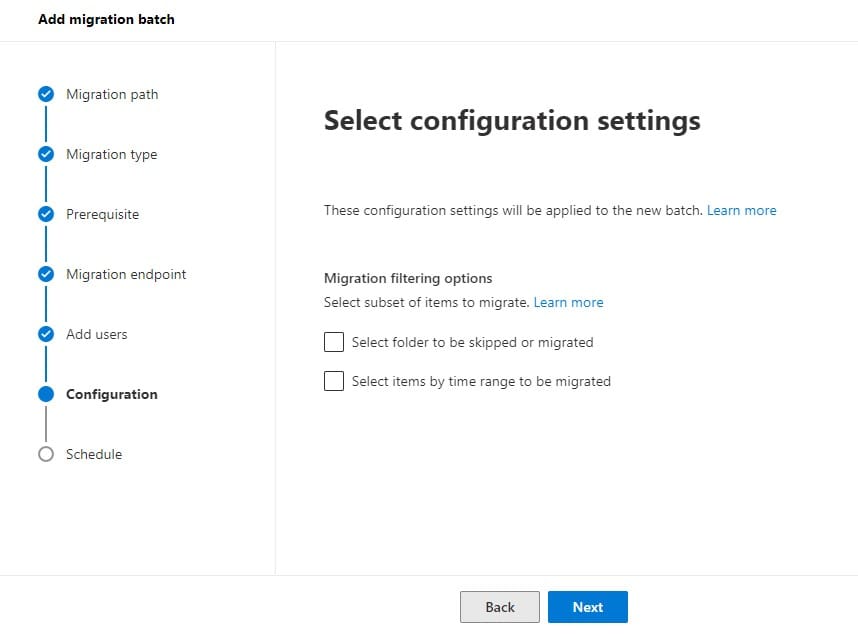
Schedule batch migration and save it.
Connection Test: Exchange Online will automatically test the connection to the IMAP server.
Review Summary: If the test is successful, you will see a summary of the endpoint configuration.

Confirm Settings: Ensure that all settings are correct, and that the endpoint is ready for use.
Conclusion
Creating an IMAP migration endpoint in the Exchange Admin Center is a critical step in migrating mailboxes to M365. By following the steps outlined in this guide, you pretty much lay the groundwork to ensure a seamless migration process.
Once your migration endpoint is set up, you can proceed to create migration batches and transfer your emails to the new environment.
If you are looking for expert guidance throughout your M365 migration, our cloud experts specialize in making migrations seamless, ensuring minimal downtime and maximum efficiency. Contact us today and you will be well on your way to leverage the benefits and ease of Microsoft 365 environment.