Microsoft Outlook is the most widely used email tool in the world & is mainly used by business professionals who send emails and have advanced security needs.
However, at some point, we found ourselves in the position of typing out and sending an email that we’ve sent before. Of course, you can copy and paste the e-mail but that is not sustainable in the long run.
If you find yourself doing this daily, you should consider setting up a Recurring Email.
What is a Recurring Email?
Email messages that are supposed to be automatically sent, periodically, based on user-defined settings.
When should you use this feature?
Though there could be several reasons to set up, some common ones are listed below:
- Reminders:
If you are responsible for sending a monthly report or completing a task, a recurring email could be of great help to remind yourself or others about it.
- Time Efficient:
Saves your time by creating the same mail every time for each user and it a hassle-free.
- Meeting Updates:
For people who forget the meeting(s), this feature is especially useful to prompt and remind people of the meeting agenda or if your meetings frequently go off track this is a way to help.
Steps to setup a Recurring email
Following are the steps to be followed.
- Open your Outlook app & select File Options Select Customize Ribbon option & make sure Developer option is selected. If it’s not, select & click OK.
- In the same Outlook Options window, go to Trust Center Trust Center Settings Macro Settings select Notifications for all macros option OK.


- After completing the above steps, the Developer option will appear at the top. If it doesn’t restart your application.

- Now, select the Visual Basic option by clicking on the Developer option.

- Inside the visual basic, (ThisOutlookSession) file will be blank for you, then go to Tools References Select the five references mentioned OK.


- Once you have done all the above steps, go to your Calendar & select the date you want to set recurring email for
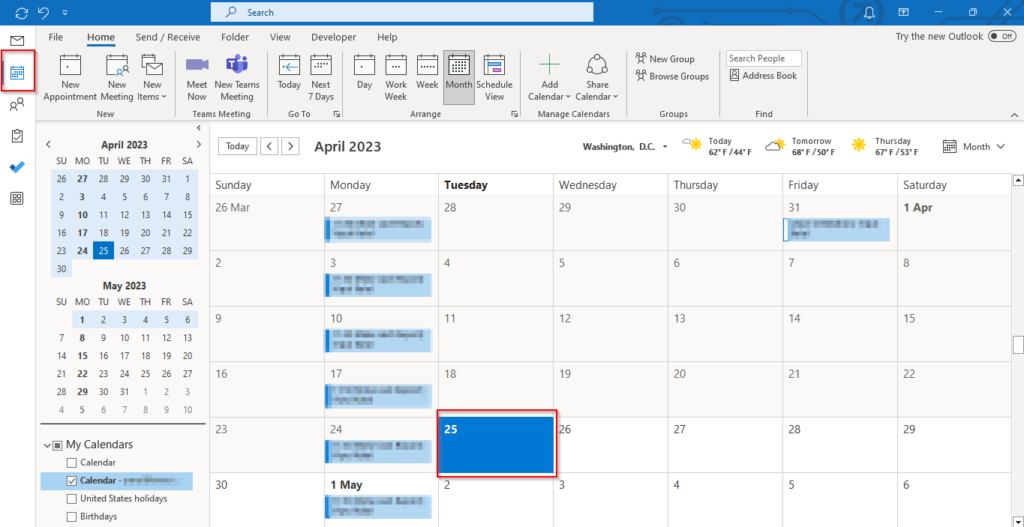
- Double-click the chosen date, and a new window will pop up as given. You can choose the Reminder, Start, and end time along with Time zones as per your preference. Then select the Make Recurring option there.
>

- On selecting the make recurring option, you will be able to select the following as per your choice, then click OK.

- Now select Categorize All Categories Select New add Name Colour Category OK OK.


- Go back to the Developer option, Select Insert Module

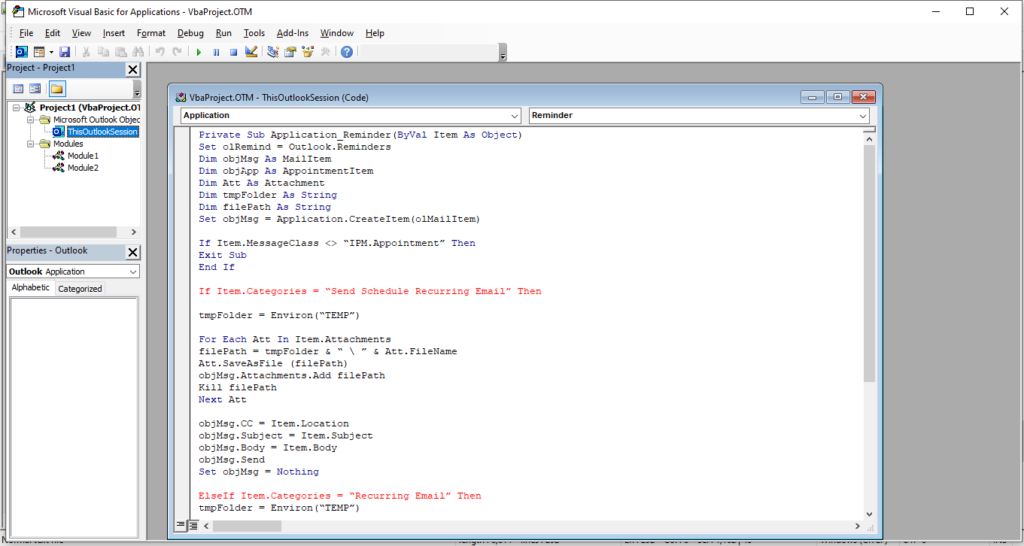
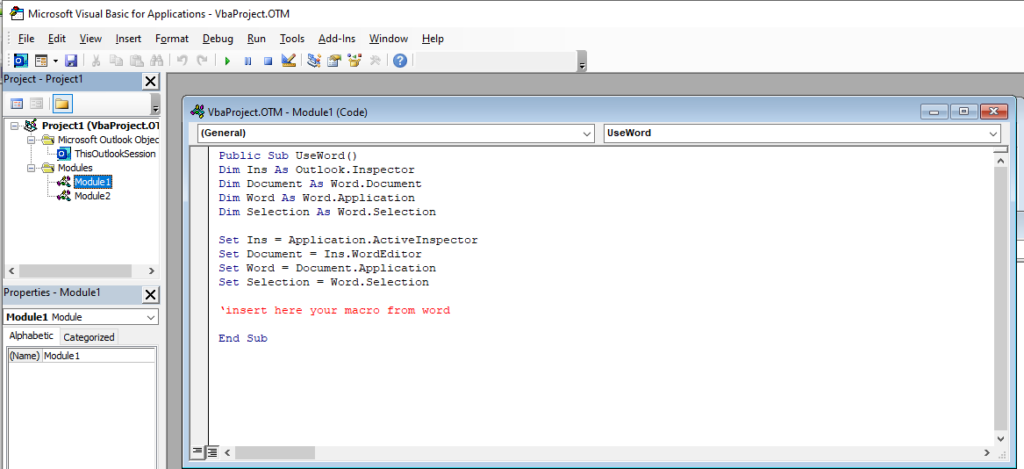
- Now add a Title & Location to the event created before, Save & Close.
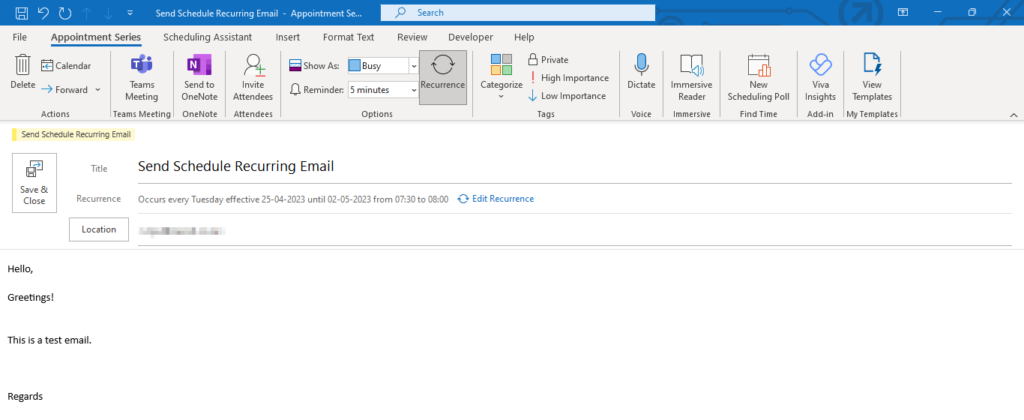
- You will see an event is created in your calendar as –

- After completing all above steps, a Reminder would be popped-up as

- A Test Email would be generated as

So, to wrap it up following the above steps you can create a recurring mail as per your preference & tasks.
Conclusion:
In conclusion, mastering productivity in today’s fast-paced digital landscape is essential. With the automation power of Outlook 365‘s recurring emails, you can save time and enhance efficiency. Whether for business or personal use, this guide empowers you to seize control of your inbox, align tasks, and pave the way for success.


