Hyper-V is a virtualization platform developed by Microsoft, which allows users to create and manage virtual machines (VMs) on their Windows computers. Creating a new VM in Hyper-V Manager may seem like a daunting task, especially for those who are new to virtualization technology. However, with the help of Hyper-V Manager, the process can be made simple and straightforward. In this blog post, we will guide you through the step-by-step process of creating a new VM in Hyper-V Manager, so you can start running virtual machines on your Windows computer with ease.
Procedure
To create a new VM from the Hyper-V manager, follow the below-mentioned steps.
Go to the Start menu and search for Hyper-V manager.
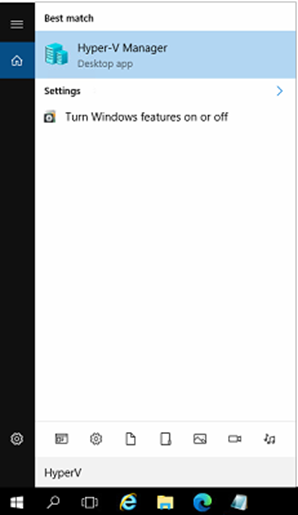
Open Hyper-V manager, Afterwards –
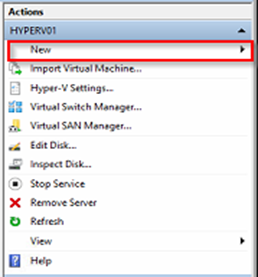
In the right pane, click on the Hyper-V host that you wish to host the new virtual machine.
In the right-hand Actions pane, click New, then Virtual Machine to start the wizard
The New Virtual Machine wizard will appear with an introductory screen that briefly explains the purpose of the wizard. If you don’t want to see this introductory screen again, you can select the Do not show this page again checkbox. Click Next to proceed.
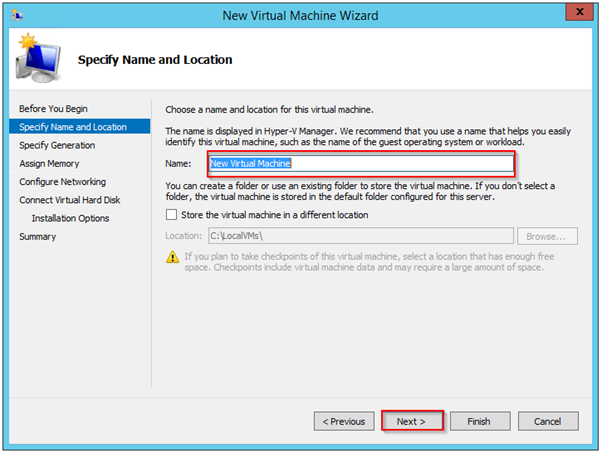
you first need to specify the name of the virtual machine. After selecting a name, you have the option to change where the virtual machine’s files are placed. By default, the location is not selectable and is already targeted to the host’s default virtual machine storage location.
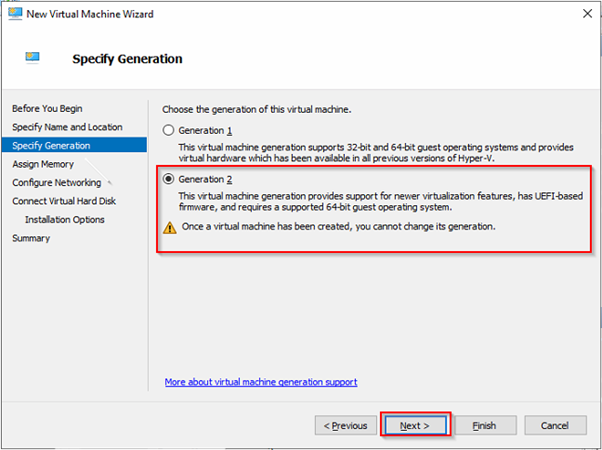
On the next screen, you’ll be asked to choose the Generation of the virtual machine. Each generation has its own set of features and capabilities, and the choice of which generation to use depends on the specific requirements of the virtual machine.
Generation 1:
- Generation 1 virtual machines are based on the BIOS firmware and emulate BIOS-based architecture.
- They support 32-bit and 64-bit operating systems.
- They support IDE and SCSI controllers.
Generation 2:
- Generation 2 virtual machines are based on the UEFI firmware and emulate UEFI-based architecture.
- They support 64-bit operating systems only.
- They support SCSI controller only.
In general, Generation 2 virtual machines are recommended when you plan to run a Windows Server 2012 R2 or later operating system. If you plan to run an older operating system, such as Windows Server 2008 R2, you should use a Generation 1 virtual machine. It’s worth noting that migration from Generation 1 to Generation 2 is not supported, you need to recreate the virtual machine if you want to change the generation.
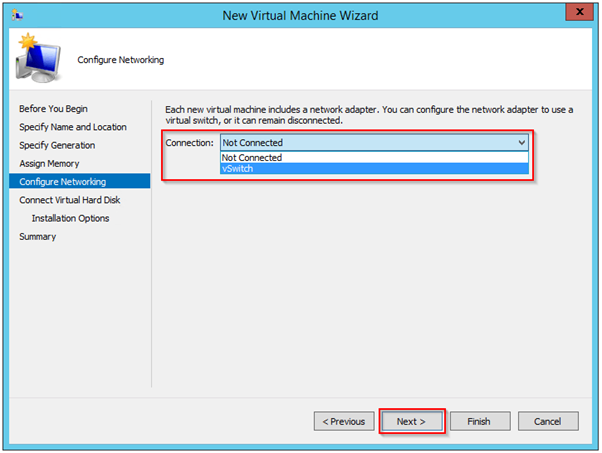
On the next screen, you set the preliminary memory settings for the virtual machine. use a value for the startup memory that is reasonable for the guest’s running purposes.

After setting the initial memory configuration, the next screen is Configure Networking. a single virtual network adapter will be automatically created. The only option you have here is to connect it to a virtual switch. And click on next.
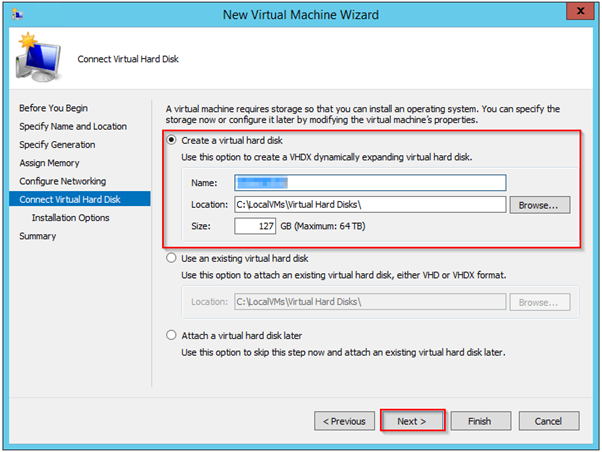
The next screen is Connect virtual hard disk. The first option is the most common choice, and it creates a completely new virtual hard disk file. Start by giving it a name. The wizard defaults to the same name as the virtual machine. The final option is the maximum size of the virtual hard disk file. This will be a dynamically expanding disk, so the file will start at a minimum size and grow as necessary, up to the maximum that you specify here.
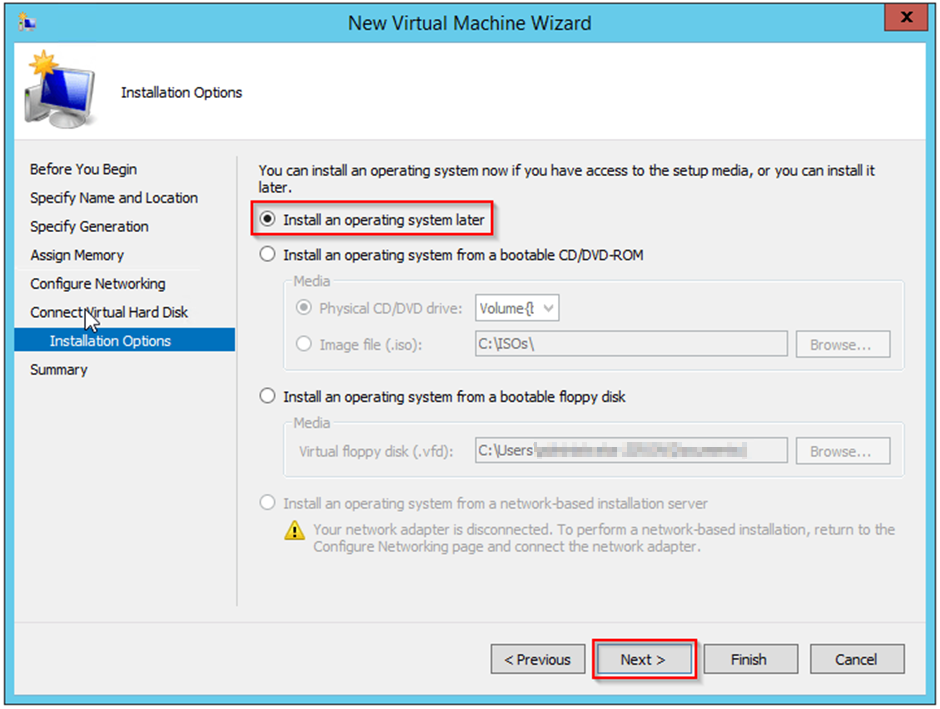
On the next screen, click on the installation option, Select Install an operating system later. And click on ‘ next’ option. After creating the VM, you can then use an installation media such as an ISO file or DVD to install the operating system on the VM. You can either connect the ISO file to the virtual DVD drive of the VM or you can use a physical DVD.
Once the operating system is installed, you can configure the settings, install applications, and start using the VM as you would with a physical computer.
It’s worth noting that when creating the VM, Hyper-V Manager also allows you to install an operating system now, where you can point the wizard to an ISO file containing the operating system, and it will automatically install it during the creation of the VM.
The process ends on the Summary screen. The final screen is simply a confirmation and make any necessary changes if any remain so.

